Tuesday, 14 May 2013

Colour temperature and white balance

Over the last two months I have been experimenting with the camera settings a good deal. And I have been spending a lot of time sitting around reading the manual.
The whole issue of colour, how it is recorded and how it changes according to the temperature of the light is really interesting.

 So some of these experiments have been pretty laid back (!) - but little differences (for example in colour and white balance) can be adjusted in camera..
 ..so that I can really fine tune which colours and tones I want to emphasize...
 ..how the whites appear...
 ..and all this can give each image a subtly different look.


On the other hand, the effects can be dramatic. Taking a custom white balance setting from something blue...
 ..gets some interesting effects.

Or maybe red:


I like this; it's lots of fun, and something creative to play around with. It also mirrors what is possible in post-production.
I have been learning to use - and experimenting with - software like Aperture, Photoshop and Lightroom (above) over the last few weeks. The adjustments that can be made are very sophisticated, with the basic tools in Camera Raw just the beginning.
The effects of colour temperature changes are interesting when you are turning colour shots like this..
50mm, ISO 200, 1/640 at f3.5
..into black and white:
The same shot with a yellow filter and some other processes applied.

Measuring light.

Together we had a look at the different ways that a DSLR camera measures light levels to get an appropriate exposure.

Here's a link to some of the resources: http://photographylife.com/understanding-metering-modes

A DSLR will measure the light reflected from a scene (as opposed to the light falling on it) and this is known as a direct reading. Many cameras have three basic metering settings:

Evaluative (or matrix)

Centre-weighted

Spot

All of these can be adjusted in camera. My Canon camera uses TTL (through the lens) light metering that is impressively accurate. All the next images are ISO 800, 17mm lens...

Evaluative/pattern metering: 1/60, f4. The camera has evaluated the entire scene (divided into zones) and used a matrix to come up with the best possible exposure. I find this a great all-round metering mode - but it can be confused by extremes of light and dark.


 Partial metering: 1/60, f4. This metering method covers about 9% of the centre of the viewfinder.


 Spot metering: 1/60, f4. This allows very specific metering of a part of a scene - less than 4% of the viewfinder area.


Centre-weighted average metering: 1/50, f3.5. The scene is metered for the centre and then averaged out for the entire scene - a method of measuring light more common in older cameras.


The scene here has presented no problems for the camera - the light is fairly even and easy to measure. But nonetheless the last method has produced a different exposure.

Metering should reflect the image you wish to create.

Evaluative metering: a snowstorm. ISO 100, 20mm, 1/50, f8


 Spot metering: a reading taken from the tree bark on the right - designed to retain texture and detail.
ISO 200, 50mm, 1/60, f1.8.

Another method is to measure the light itself, irrespective of the subject, and this is known as an incident light reading.
This is something I have begun to do more, although it is not always practical. A reading from an 18% grey card (top rectangle above) disregards the sort of local differences that can confuse the camera meter and often gives an excellent starting point for calculating exposure.

Wednesday, 8 May 2013

Scrapbook

As well as all the technical exercises that are happening I need to put some other shots on here too, and it would be good to have a bit of a scrapbook.


And this is one of this week's favourites: a new park in Salford.


Lenses and focal length

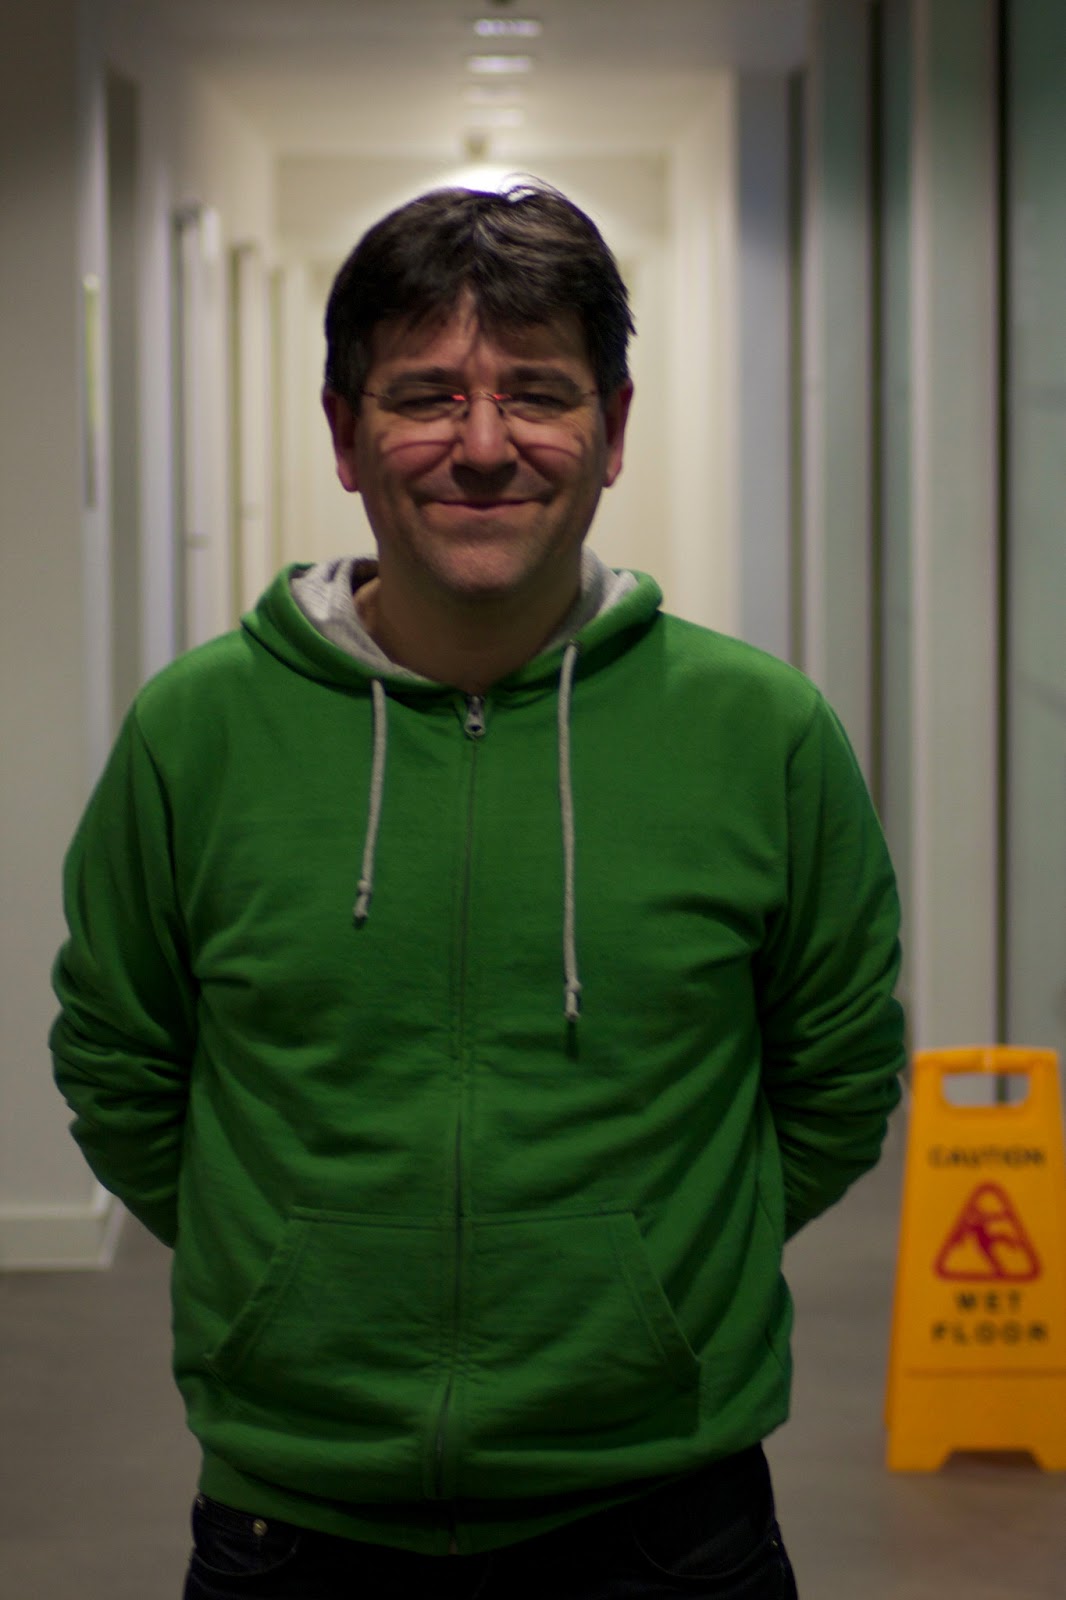
Things have been getting pretty technical around here recently - lots of exercises to get a better understanding of how things (i.e. my kit) work. Here is Fran helping me get a better idea of how lenses and different focal lengths really function.

 1. 1/60, f2.8, 17mm. This is the shortest focal length and so the widest angle on my favourite Canon telephoto zoom. I've shot Fran so that his waist is at the bottom of the shot and there is around a hand's distance above his head.

 2. 1/50, f2.8, 20mm. The idea is to get the same shot - from the waist to a hand above Fran's head - but by working my way through the focal lengths. I take a step back to get this.

 3. 1/60,  f2.8, 28mm. So each time the focal length changes, to keep the same shot I have to move backwards away from Fran.

 4. 1/60, f2.8, 35mm. It is the opposite of what often happens: I can remain in the same spot and as the zoom moves (changing the focal length) it transforms the shot.

 5. As above, 55mm. The longest focal length of my zoom. The difference that the lens and the FL makes to the subject and to the background becomes clear in these shots - Fran at 17mm looks very different to Fran at 55mm, and so does the corridor.

 6. 1/80, f2.8, 50mm. This is a bit of an anomaly - my 50mm lens is EF and so designed for a full-frame sensor/35mm film. It increases the effective focal length on my cameras APS-C size sensor to approx 80mm. There is a link to some notes on this below.

 7. 1/50, f4.0, 70mm. A bigger zoom lens, and perspective is really beginning to get compressed.

 8. 1/80, f4.0, 100mm. The background view that I started with is disappearing fast. I'm a long way away from Fran now, and still moving back for each shot. I am doing the legwork that a zoom lens usually does for you.

 9. 1/50, f4.5, 135mm.

 10. 1/40, f4.5, 180mm. By now I'm at the other end of the corridor. The shutter speeds get slower as the maximum aperture gets higher...

11. 1/30, f5.6, 300mm. ...and this makes camera shake inevitable, particularly hand holding a big telephoto lens. The corridor background has almost completely disappeared and the subject is isolated.

So that is an insight into just what the different focal lengths are doing - not only showing more or less of a scene, but making subtle but distinct differences to the image itself.


 These are my two lenses, not to scale. And below is a telephoto lens (similar FL's to Fran's) that I would very much like to possess!


 A big thank you to Fran for his patience and the use of his lens. Hope to see you soon if you read this! Here's the link to some notes on sensor sizes from one of our sessions:
Sensors and Lenses PDF